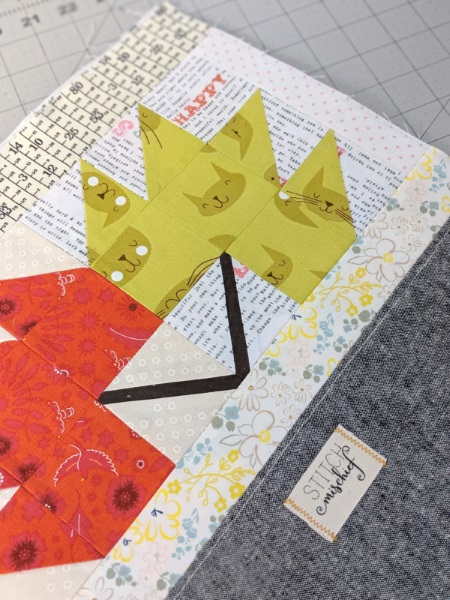
Happy almost autumn everyone! Can you believe we are already in the month of September? I’m still trying to figure out where summer went. We’ve been working on some fun things to go along with our Finch Bucket Make Along.
First up is a fun scrappy maple leaf block. If you’ve ever seen my quilts, you’ll know I’m a HUGE fan of scrappy quilts. I hoard my scraps (and use them) diligently. There is just something about taking that little scrap of fabric and using it in a special project that feels so good, so green and economical.
This particular maple leaf block will have an unfinished measurement of 6 1/2″. This means that the finished block will measure in at 6″ with a perfect seam allowance.
FABRIC REQUIREMENTS:
| Background Fabric(s) | Leaf Fabric(s) | Stem Fabric(s) | ||
| 2 1/2″ squares | 1 | 3 | – | |
| 3″ squares | 3 | 2 | – | |
| 4″ x 3/4″ strip | – | – | 1 |
TOOLS:
- rotary cutter, ruler and mat
- fabric marker
- quarter inch foot
A NOTE ON FABRIC SELECTION
The sky is the limit here. You could make a completely scrappy block where no two fabrics match, with different leaf fabrics throughout the leaf, and different background fabrics.
Alternatively, you could keep your background fabric as one specific fabric, and the leaf fabric as one specific fabric. Or you could do a mix of both methods with a fully scrappy leaf paired with a consistent background. You could even reverse that and have the background be fully scrappy and the leaf fabric be consistent.
Regardless of what you choose, you will need to decide before cutting out your fabrics.
Creativity is contagious. Pass it on.
– Eugene Raudsepp *
DIRECTIONS
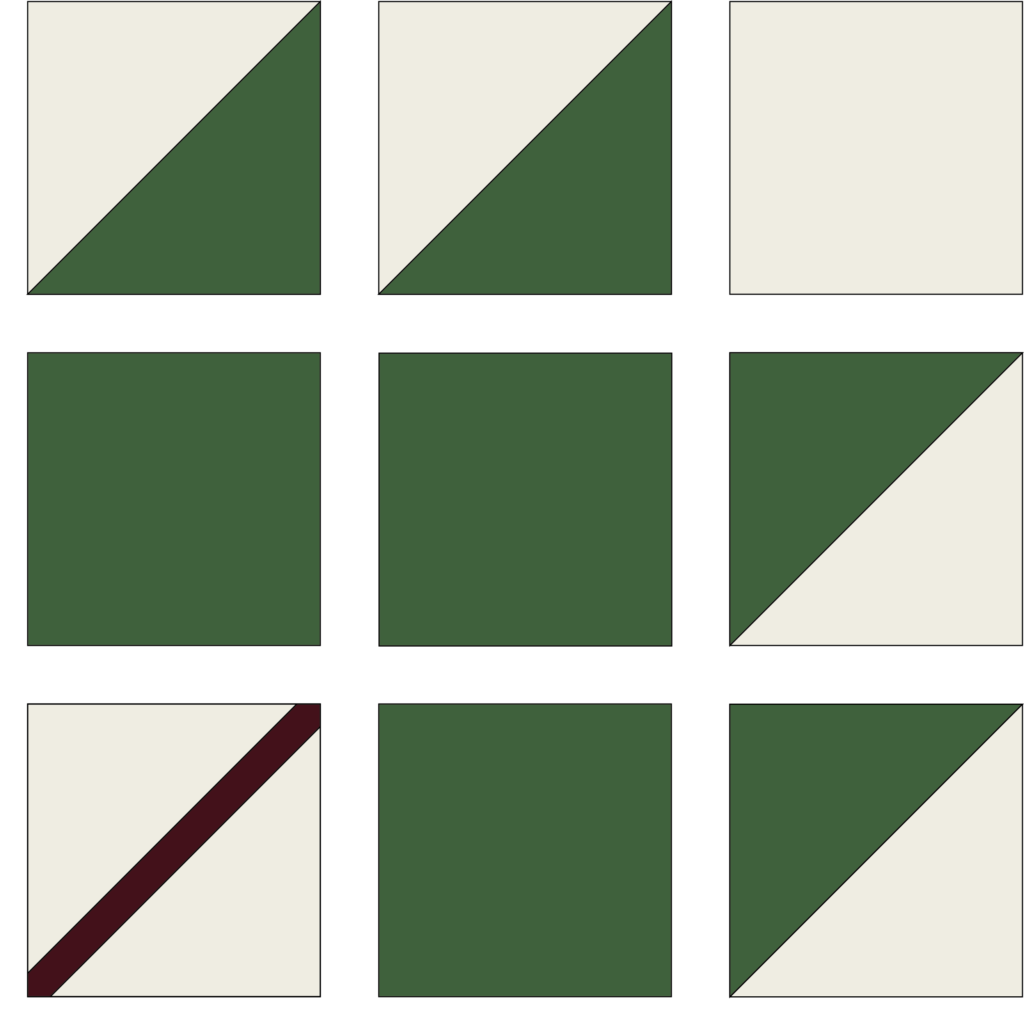
Making the Half Square Triangles
- Take one 3″ leaf square and one 3″ background square and place them right sides together. Using a fabric marker, make a line from corner to opposite corner on the back of the lightest fabric.
- Repeat with the second 3″ leaf square and a second 3″ background square.
- Using a quarter inch foot, stitch a line 1/4″ away from the marker line. Rotate the block and stitch using a 1/4″ seam allowance on the other side of the marker line. (The pair of squares will now have the marker line sandwiched between stitching lines on each side.)
- Repeat with the second pair of leaf and background squares.
- Using a rotary cutter and ruler, carefully cut along the marking line. This will result in two pairs of triangle pieces of fabric joined by a line of stitching. Each of these is now known as a half square triangle or HST.
- Press each triangle, unopened, to set the seam.
- Open the triangle and press the seam allowance towards the dark side of the fabric. Repeat with the remaining three HSTs.
- Trim the HST using your preferred method. You will need to trim the square to 2 1/2″. I’ve made a video tutorial on two methods of doing this here.
Making the Stem Block
- Take the remaining 3″ background square and line a ruler up from one corner to the opposite corner. Using a rotary cutter and mat, cut the square into two right triangles.
- Using one of the triangles and the stem piece of fabric (4″ by 3/4″), center the stem along the long angle of the triangle or hypotenuse.
- Stitch using a quarter inch seam allowance.
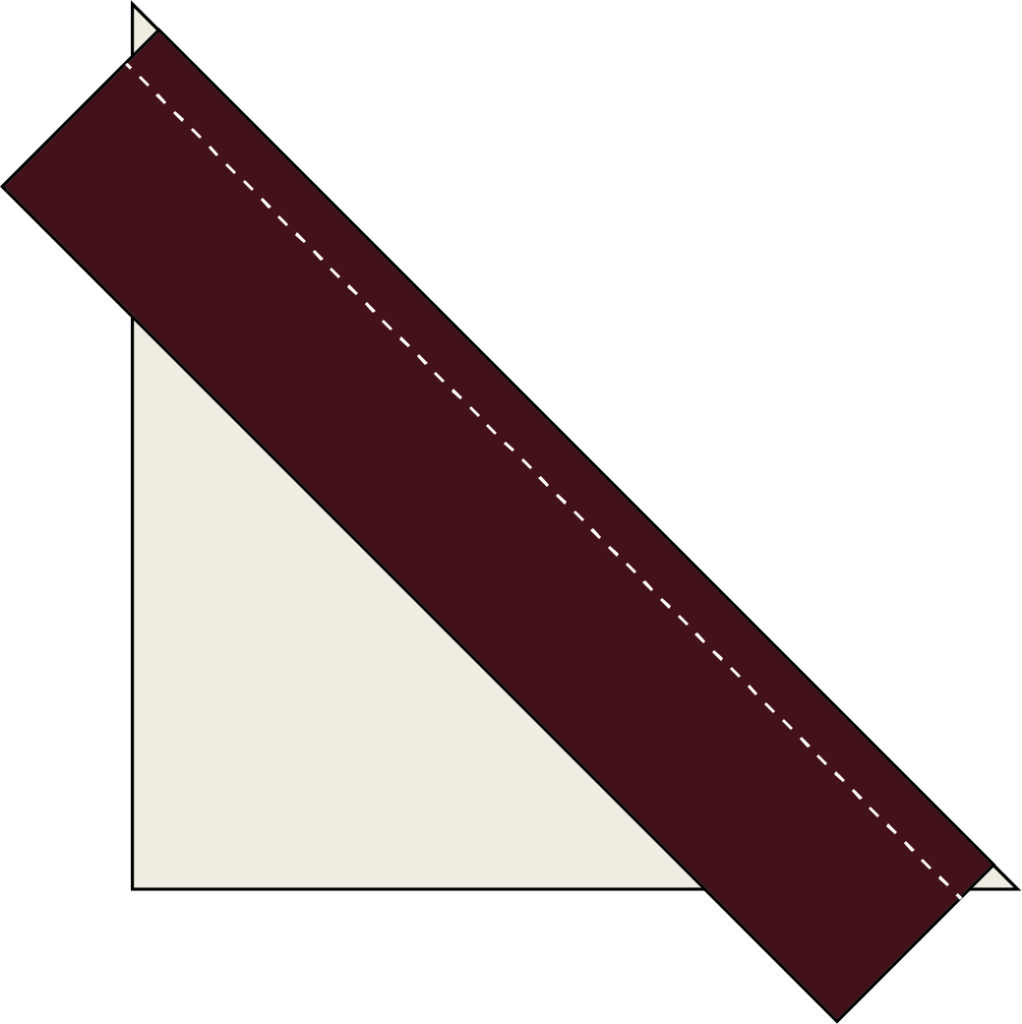
- Press the unit to set the seam and then gently press the seam allowance away from the stem towards the background fabric.
- Take the second right triangle and place it right sides together with the sewn unit, centering it along the stem edge.
- Stitch in place with a 1/4 seam allowance.
- Press the unit to set the new seam and then gently press the seam allowance away from the stem towards the background fabric.
- Trim the pressed square down to exactly 2 1/2″ using the same sort of method used to trim HST squares used here.
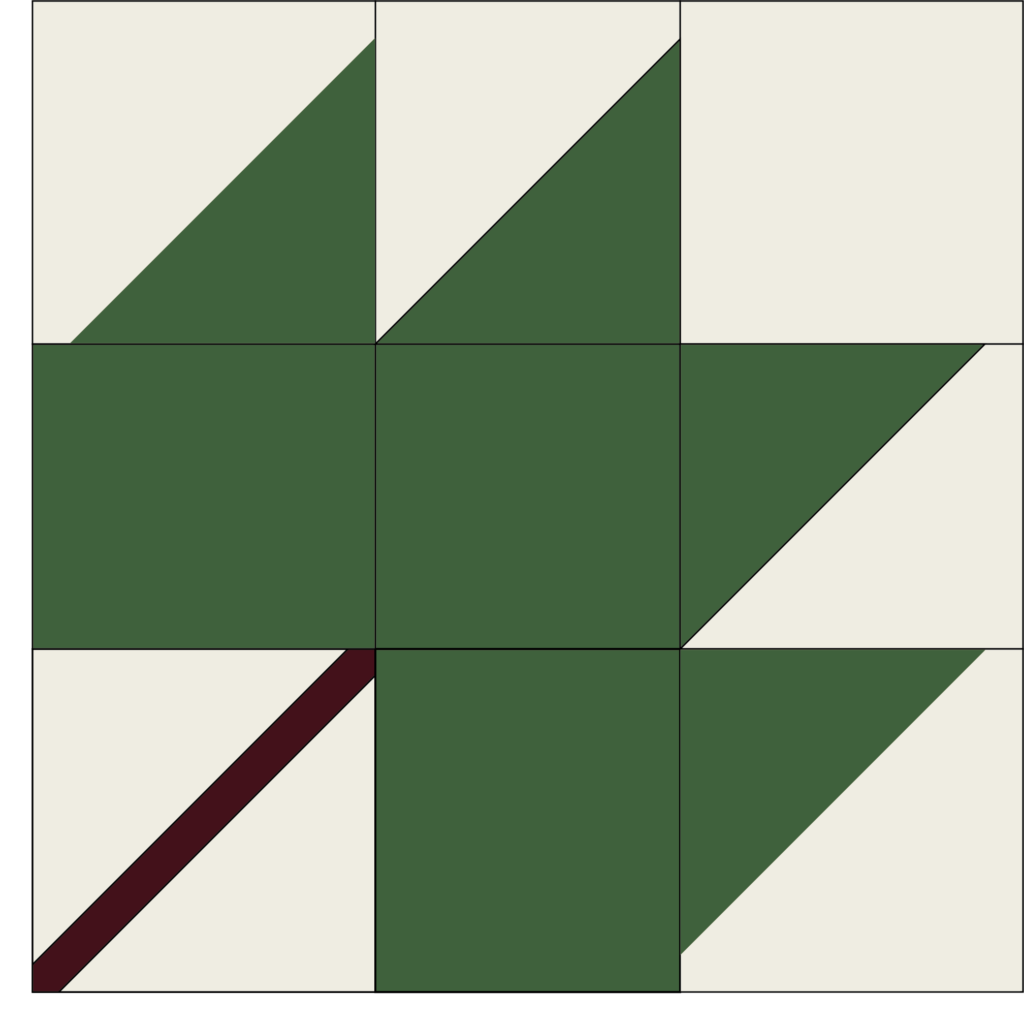
Assemble the Block
Lay out the finished squares as follows before sewing.
Working row by row, top to bottom, sew the blocks together. Press seams open.
Pin rows 1 and 2, right sides together, carefully matching seams. Stitch using a 1/4″ seam allowance. Repeat with rows 2 and 3. Press both seams open.
Your maple leaf block is now finished!
* Contrary to popular belief, the author of this quote is not Albert Einstein.
Thanks so much for making it easily doable and including all the options!
Thank you for your generosity ~ gosh, your family must be proud of you! Huge 🤗 hugs! 🧵❤️🧶