We have reached the end of the Finch Bucket Make Along for 2022. I’m still so surprised that people a) enjoy making this pattern and b) tend to make it alot. A friend of mine calls it a “potato chip pattern” – you can’t make just one. 🙂
To get your copy of the pattern, click here.
Today, I’m going to break down how I made my modified flying geese Finch Bucket in the midi size. As a lover of all things scrappy, and someone who cannot throw fabric away, this modification was just the ticket for some scrap diving. I did mine in a black and white palette with a splash of aqua to add a zip of colour.
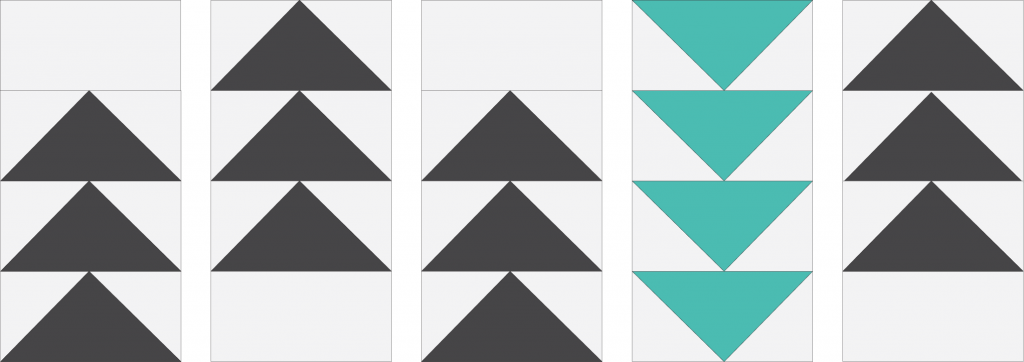
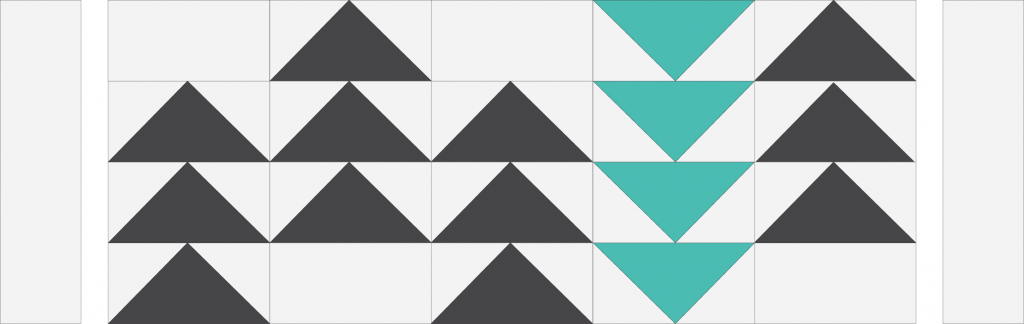
The base block to this modification is a flying geese – made up of one rectangle and two squares. For my bucket, to show different ways you could play with the color, I made one side with scrappy low volume fabrics as the background, and on the other side of the bucket, I used scrappy black prints. The geese on the first side were black but on the second side, the geese were made up of low volume/light prints. Both sides have one section with a string of geese in aqua.
To make your own version of this modified midi sized Finch Bucket, you will need the following:
| Main Flying Geese Blocks (unfinished size: 3 1/2″ x 2″) | Accent Colour Geese Blocks (unfinished size: 3 1/2″ x 2″) | |
| One Side | 12 | 4 |
| Both Sides | 24 | 8 |
Cutting Instructions
The geese blocks finish at 3″ by 1 1/2″. Each geese is made using one 3 1/2″ x 2″ rectangle and two 2″ squares. Note: the rectangle will be the “goose” in each block, while the squares are the background fabric.
Fabric For One Flying Geese Panel (Two Flying Geese Panels)
| Background Fabric | Geese Fabric | Accent Geese Fabric | |
| Rectangles – 3 1/2″ x 2″ | 4 (8) | 12 (24) | 4 (8) |
| Rectangles – 6 1/2″ x 1 3/4″ | 2 (4) | ||
| Rectangles – 18″ x 1 1/4″” | 2 (4) |
Use my tutorial https://www.stitchmischief.com/2022/07/flying-geese-tutorial/ learn how to make the flying geese for this modification. Make the required geese blocks, and cut out the remaining background fabric pieces.
Arrange your blocks as shown below and stitch the blocks into rows using a 1/4″ seam allowance. Press each rows seam allowances in alternating directions to facilitate locking seams for the next step.
Sew your rows together, locking seam allowances, using a 1/4″ seam allowance.

Stitch the shorter rectangles to each side of the above block.

Press the seam allowances away from the center.
Stitch the two longer rectangles to the top and bottom of the piece above, and press the seam allowances away from the center again.

Repeat for the second panel if desired.
In the Finch Bucket pattern, move on to step 1 – Fabric Preparation.
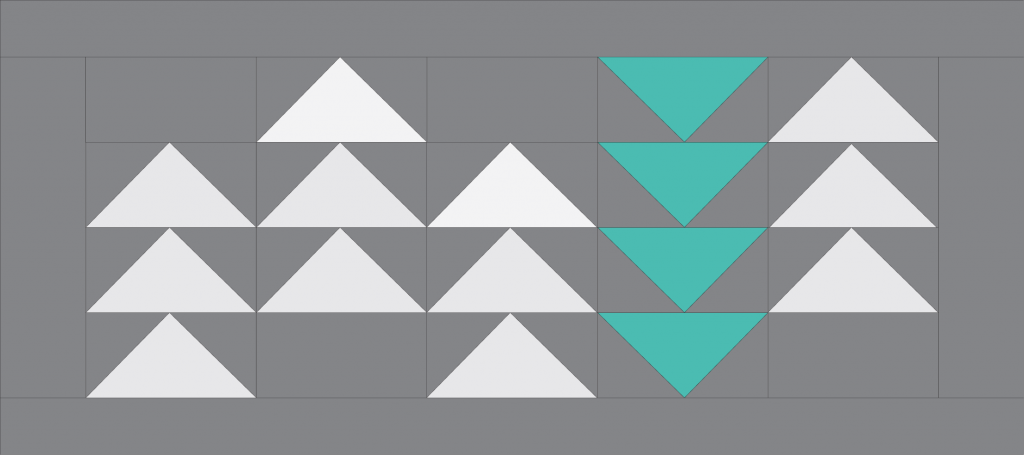
To see how the colours would play with an inverted color scheme, I’ve attached the following diagram.
Thank you!! I can’t wait to try this 💞